
最近Youtubeでイケメンボイスで録音された動画を見ることがありますが、あれ?どこかで聞いたことある音声と思うことがあります。
もしかしたら、それは音声合成かもしれません。
音声合成とは、人間の音声を人工的に作り出すことです。
以前はペッパー君がしゃべるような機械的な発音でしたが、近年めまぐるしい成長をとげ、まるで人間(?)のように読み上げてくれます。
しかも、自分より声質も滑舌もいいです。うらやましい。
いろいろな音声合成サービスがありますが、ここではGoogle Cloud Text-to-Speechという、テキストを読み上げてくれる音声変換サービスを使ってみます。
日本語を含め、40以上の言語に対応しています。
料金
Text-to-Speech の料金は、音声への合成のためにサービスに送信された文字数に基づいて、月単位で請求されます。
使用量が 1 か月間に無料で使用できる文字数を超えると、自動的に課金されます。
入力文字列の合計文字数は、課金を目的としてカウントされます。注意する点として、文字数にスペースも含まれます。
文庫で1冊10~12万字ぐらいなので、個人で使うには十分な無料枠があるかと思います。
| 機能 | 1 か月あたりの無料枠 | 無料の使用量上限に到達した場合の料金 |
|---|---|---|
| 標準(非 WaveNet)音声 | 0〜400 万文字 | 100 万文字あたり $4.00(USD) |
|
WaveNet 音声 |
0〜100 万文字 | 100 万文字あたり $16.00(USD) |
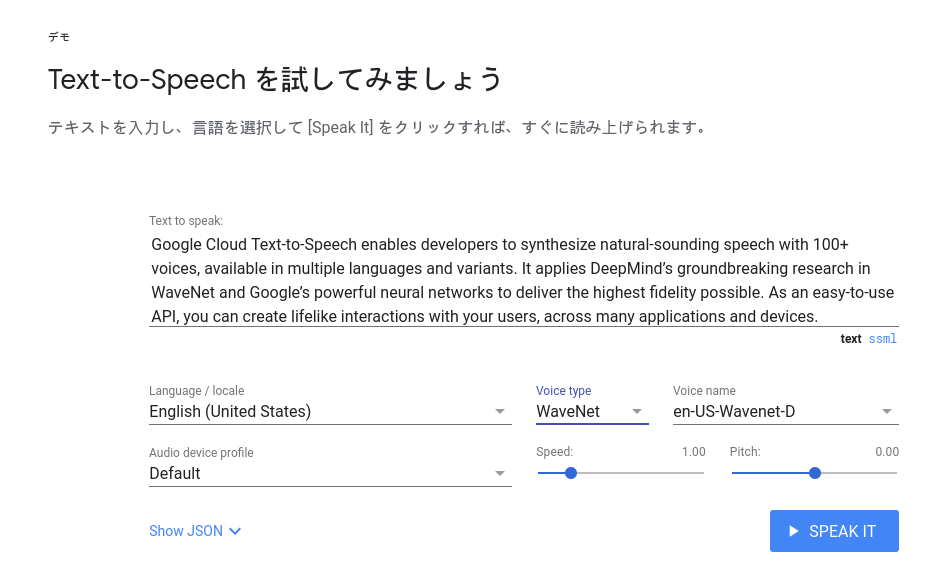
デモサイト
https://cloud.google.com/text-to-speech/ のデモサイトで、テキストを入力し、「SPEAK IT」をクリックすると読み上げてくれます。
APIの有効化
Cloud Text-to-Speech API を有効化します。標準音声は月間400万文字、より自然な発音を可能とする WaveNet音声は月間100万文字の読み上げまでは無料で使えます。
左上の「≡」メニューから「APIとサービス」>「ライブラリ」を選択します。
補足: 2023/8時点でのリンク: https://console.cloud.google.com/apis/
「Text-to-Speech」を検索して選択します。
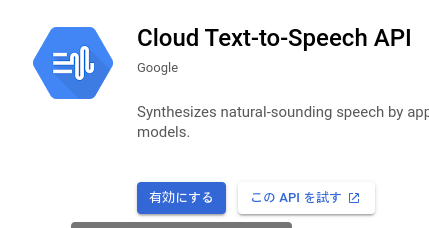
「有効にする」をクリックします。
プロジェクトの作成
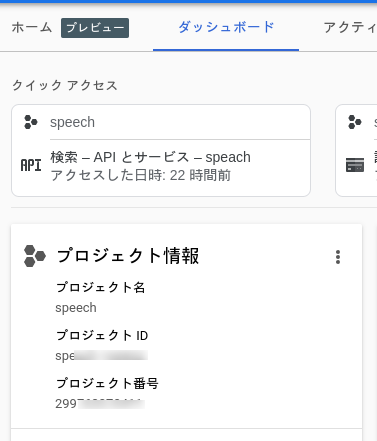
「プロジェクトを選択」のページから、プロジェクトを作成します。
プロジェクト名を入力し、作成するとプロジェクトIDも作成されます。
こちらが、のちのち必要になるのでメモしておいてください。

Google Cloud SDKのインストール
ここでは、Fedora 34にインストールしていきます。
補足: Mac Ventura 13.5.1でも同じです。
はじめに、Pythonがインストールされていることを確認してください。ここでは、Python 3.9.4を利用しています。
SDKをインストールするディレクトリで、次のコマンドを実行します。
インストール先が、デフォルトのままでよければ、エンターを押してください。
$ cd ~
$ curl https://sdk.cloud.google.com | bash
するとインストールがはじまり、途中いくつかの質問がされます。
yを入力し、シェルのパスは、エンターを入力してください。
Do you want to help improve the Google Cloud SDK (y/N)?  y
...
Modify profile to update your $PATH and enable shell command
completion?

Do you want to continue (Y/n)?  y
...
Enter a path to an rc file to update, or leave blank to use
[/home/you/.bashrc]:
Backing up [/home/you/.bashrc] to [/home/you/.bashrc.backup].
[/home/you/.bashrc] has been updated.
シェルの設定を再度読み込み、gcloudが実行できるか確認します。
$ source ~/.bash_profile
$ gcloud help
ここで、HELPページが表示されれば完了です。
Google Cloud SDKの初期化
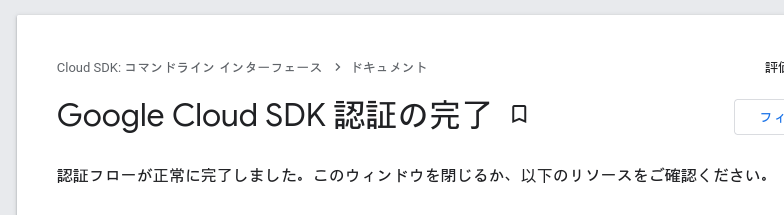
次のコマンドを実行して、SDKを認証します。 途中、ログインするかと質問されるので、Yを入力します。
$ gcloud init
...
You must log in to continue. Would you like to log in (Y/n)?  Y
Googleアカウントでログインし、Google Cloud SDKのリクエストを許可します。
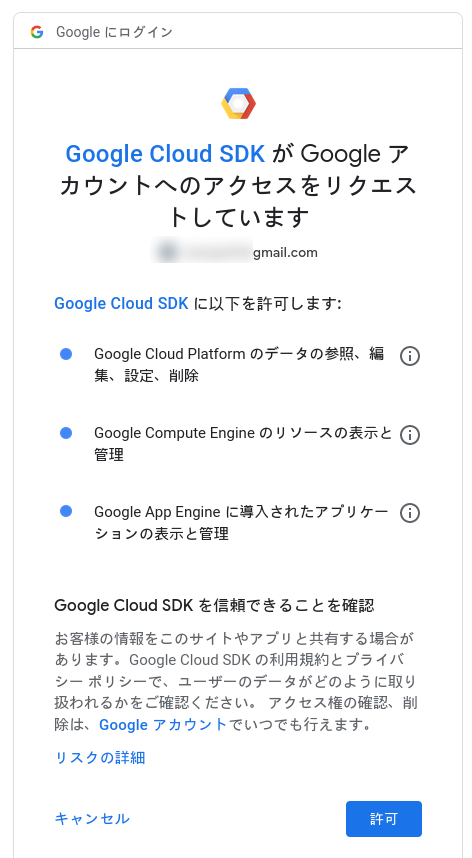
「許可」をクリックすると、完了しましたと表示されます。
プロジェクトの選択
先程のコマンドを実行しているターミナルに戻り、作成したプロジェクトのIDを選択します。
Pick cloud project to use:
 [1] inlaid-micron-234010
 [2] plenary-office-159913
 [3] sound-arcade-234009
 [4] speech-168802
 [5] tribal-archery-271617
 [6] Create a new project
Please enter numeric choice or text value (must exactly match list
item):  Please enter a value between 1 and 6, or a value present in the list:  Please enter a value between 1 and 6, or a value present in the list:  Please enter a value between 1 and 6, or a value present in the list:  Please enter a value between 1 and 6, or a value present in the list:  4
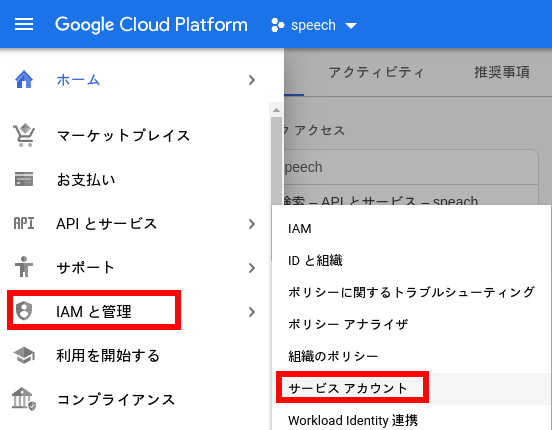
認証情報の作成
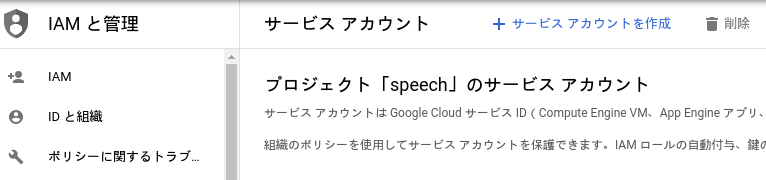
「IAMと管理」-> 「サービス アカウント」を選択します。
次に、「サービス アカウントを作成」をクリックします。
- サービス アカウント名を入力し、「作成」をクリックします。
- ロールは、選択しないで、「続行」をクリックします。
- 「ユーザにこのサービス アカウントへのアクセスを許可」も空欄で「完了」をクリックします。
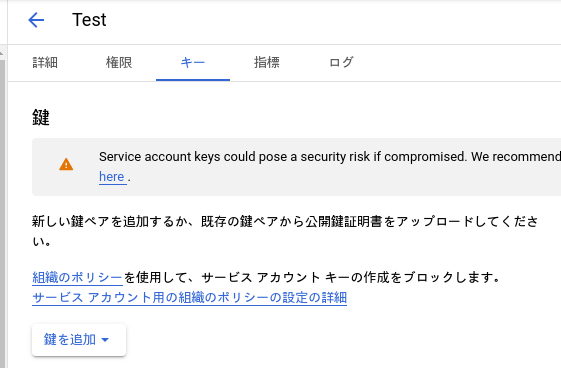
次に、キーを作成します。
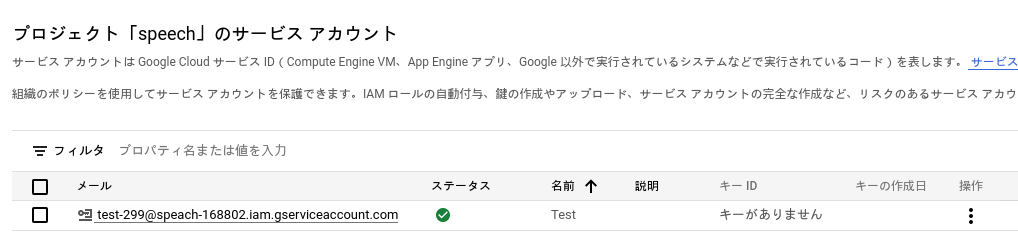
先程作成したサービス アカウントをクリックし、鍵を作成します。
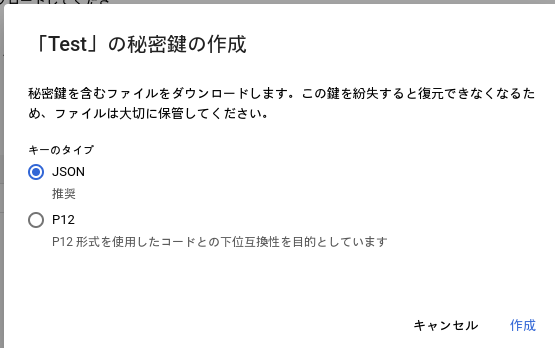
キーのタイプJSONを選び、作成をクリックします。
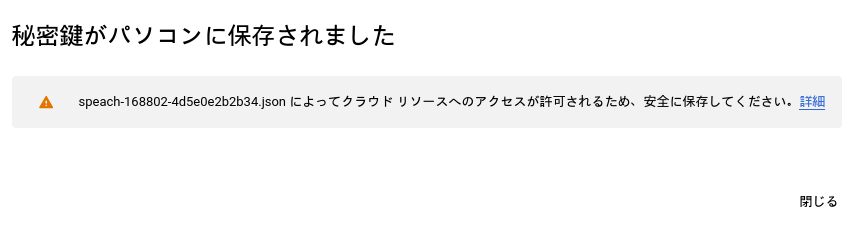
すると秘密鍵がダウンロードされます。
次のようにキーのパスを指定して、認証情報を設定します。
$ gcloud auth activate-service-account --key-file=/home/you/install/google/key/speach-168802-4d5e0e2b2b34.json
また、GOOGLE_APPLICATION_CREDENTIALSという環境変数にもキーのパスを追加します。
$ export GOOGLE_APPLICATION_CREDENTIALS=/home/you/install/google/key/speach-168802-4d5e0e2b2b34.json
これで、下準備が終わりました。
Text-to-Speech へのリクエストの実行
まずは、英語で定番のHello, worldと言ってもらいましょう。
ここでは、Pythonのクライアント ライブラリをインストールして、Pythonを使ってGoogleのサンプルコードを実行してみましょう。
$ pip install --upgrade google-cloud-texttospeech
#!/usr/bin/env python

# Copyright 2018 Google Inc. All Rights Reserved.
#
# Licensed under the Apache License, Version 2.0 (the "License");
# you may not use this file except in compliance with the License.
# You may obtain a copy of the License at
#
#      http://www.apache.org/licenses/LICENSE-2.0
#
# Unless required by applicable law or agreed to in writing, software
# distributed under the License is distributed on an "AS IS" BASIS,
# WITHOUT WARRANTIES OR CONDITIONS OF ANY KIND, either express or implied.
# See the License for the specific language governing permissions and
# limitations under the License.

"""Google Cloud Text-To-Speech API sample application .

Example usage:
    python quickstart.py
"""


def run_quickstart():
    # [START tts_quickstart]
    """Synthesizes speech from the input string of text or ssml.

    Note: ssml must be well-formed according to:
        https://www.w3.org/TR/speech-synthesis/
    """
    from google.cloud import texttospeech

    # Instantiates a client
    client = texttospeech.TextToSpeechClient()

    # Set the text input to be synthesized
    synthesis_input = texttospeech.SynthesisInput(text="Hello, World!")

    # Build the voice request, select the language code ("en-US") and the ssml
    # voice gender ("neutral")
    voice = texttospeech.VoiceSelectionParams(
        language_code="en-US", ssml_gender=texttospeech.SsmlVoiceGender.NEUTRAL
    )

    # Select the type of audio file you want returned
    audio_config = texttospeech.AudioConfig(
        audio_encoding=texttospeech.AudioEncoding.MP3
    )

    # Perform the text-to-speech request on the text input with the selected
    # voice parameters and audio file type
    response = client.synthesize_speech(
        input=synthesis_input, voice=voice, audio_config=audio_config
    )

    # The response's audio_content is binary.
    with open("output.mp3", "wb") as out:
        # Write the response to the output file.
        out.write(response.audio_content)
        print('Audio content written to file "output.mp3"')
    # [END tts_quickstart]


if __name__ == "__main__":
    run_quickstart()
実行すると、mp3ファイルが作成されます。
$ python quickstart.py
Audio content written to file "output.mp3"
こちらが、読み上げてくれた音声です。
また、日本語の音声も複数提供されています。
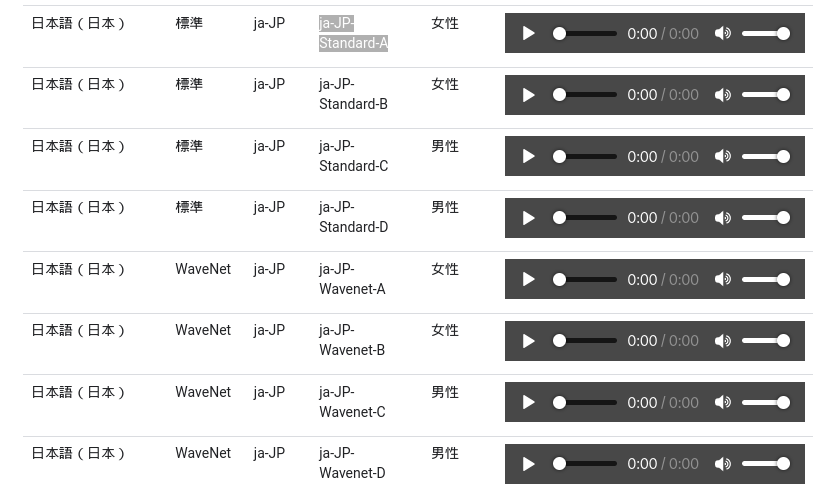
そこで、ja-JP-Wavenet-Dを利用して、日本語の読み上げをテストしてみました。
先程のquickstart.pyを少し変更してみました。こちらが、差分となります。
$ diff quickstart.py quickstart-JP.py
37c37
<     synthesis_input = texttospeech.SynthesisInput(text="Hello, World!")
---
>     synthesis_input = texttospeech.SynthesisInput(text="武士 木村安兵衛は 明治維新によって失業し、日本初のパン屋を開業したそうです。そこで、あんパンが発明されたみたい。")
42c42,44
<         language_code="en-US", ssml_gender=texttospeech.SsmlVoiceGender.NEUTRAL
---
>         language_code="ja-JP",
>         name="ja-JP-Wavenet-D",
>         ssml_gender=texttospeech.SsmlVoiceGender.MALE,
57c59
<     with open("output.mp3", "wb") as out:
---
>     with open("output-JP.mp3", "wb") as out:
60c62
<         print('Audio content written to file "output.mp3"')
---
>         print('Audio content was written to file "output.mp3"')
ポイントは、text=に読み上げる日本語を追加し、つぎの言語や音声に関する項目3点を指定しています。
language_code=”ja-JP”
name=”ja-JP-Wavenet-D”
ssml_gender=texttospeech.SsmlVoiceGender.MALE
そして、出来上がった音声がこちらとなります。
まとめ
Text-to-Speechというテキストを読み上げてくれる音声変換サービスについて簡単にご紹介しました。
まだまだラジオのDJのように流暢ではありませんが、それでも違和感なく理解できるレベルかと思います。
また、40以上の言語に対応しているので、一度テキストを作成してしまえば、簡単に翻訳や翻訳された言語での読み上げができそうです。
なかなか40言語もマスターすることは難しいので、こういったサービスを活用するのもアリかもしれません。
参考資料:https://cloud.google.com/text-to-speech/docs/samples


コメント